


Colorless Color Wheel
What You Need:
1 white paper plate Cereal bowl or coffee can lid Markers, crayons, or colored pencils: purple, blue, green, yellow, orange, red. Scissors Ruler Thumbtack or push pin Pencil with eraser Protractor Be sure to have an adult supervise the project any time there are sharp objects involved!
What You Do:
Draw a circle: Use the cereal bowl or plastic lid to trace a circle onto one of the paper plates.
Find the center of the circle: With a pencil, use a ruler to draw a straight line that touches the circle and extends to the edges of the paper plate. Do this again on the opposite side of the circle so that the lines intersect near the top of the plate. Then, do the same thing – draw two straight lines on each side of the circle that intersect — at the bottom of the circle. Now, line the ruler up with the left and right intersections and very lightly make a one-inch line in the center of the circle. Then, align the ruler with the top and bottom intersections and lightly draw a one-inch line in the center of the circle. Where the two short, light lines intersect is the center of the circle! Put a dot there and erase one of the short, light lines inside the circle.
Draw lines in the circle to make six equal parts: Place your ruler on the remaining light line, aligning it with the intersecting lines again, and draw the line to extend from the center dot to the edge of the circle. Put the 0-degree mark of the protractor (not the 0-inch mark, but the 0-degree mark of the protractor) on the center dot, with the straight edge along your line. Find 60 degrees on the curved edge and make a dot outside the circle. Use the straight edge to make a light line between the center dot and 60-degree dot. Again, place the 0-degree mark on the center dot, align the straight edge on the line you just made, make a dot outside the circle at 60 degrees. Repeat until you have lines dividing the circle into six equal parts.
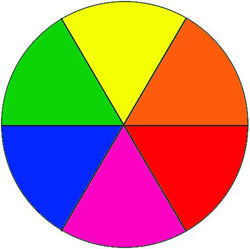
Color each section: Choose a section to start with and color it purple. Then, move to the next section and color it blue. Continue around the circle with green, yellow, orange, and red, in that order.
Cut out the circle with scissors.
Attach the color wheel to the eraser of a pencil. Use a thumbtack or push pin to make a hole in the center of your color wheel, and stick it into your pencil eraser.
Spin the color wheel: Lay the pencil on the edge of a table with the color wheel hanging over the edge. Use the palm of your hand to push and spin the pencil as fast as you can and watch the color wheel turn white!
No comments:
Post a Comment